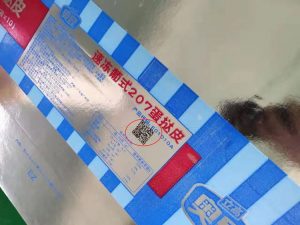
Will the industrial inkjet printing come off after lamination?
-
Relationship Between Lamination and Printing
Lamination is a common manufacturing process used to enhance product protection and aesthetics. Coding, on the other hand, refers to spraying identification information onto product surfaces for traceability and management purposes. Consequently, lamination and coding are often performed concurrently in production.
-
Does Lamination Affect Printing Adhesion?
Due to the smooth surface of laminated materials and the poor adhesion of some materials, there is concern that codes may peel off after lamination. In practice, however, proper lamination processes can ensure code adhesion. For example, surface treatments such as sanding or applying primer before coding can improve adhesion. Additionally, adhesives and curing agents can be added after coding to protect the print.
-
How to Prevent Printing Peeling After Lamination
To prevent printer from peeling after lamination, select appropriate lamination materials and processes, such as using lamination films, coated lamination, or heat pressing. Conduct quality inspections on coded products, and implement protective measures during storage, transportation, and handling. For special requirements, alternative marking methods like laser engraving or stamping can be used to eliminate the risk of code peeling.
Conclusion
Four steps to quickly troubleshoot UV printer failures
When a UV printer suddenly malfunctions on a production line, taking prompt action to minimize downtime and restore operations is critical. This article outlines rapid troubleshooting and maintenance methods for UV Printer issues to help you resolve emergencies and get production back on track as quickly as possible.

-
Immediate Shutdown and Power Cutoff
When a fault is detected in the UV printer, first shut down the equipment immediately and disconnect the power supply. This ensures safety and prevents the fault from escalating further.
-
Identify the Fault Type
After shutdown, perform an initial troubleshooting check. Determine whether the issue is mechanical, electrical, or caused by other factors. Through observation and inspection, identify the fault type as accurately as possible.
-
Locate the Root Cause
Once the fault type is confirmed, proceed to identify the specific cause. Inspect components and systems that may lead to the issue, such as the printhead, inkjet system, and drive system. Check for loose connections, damaged parts, or other abnormalities.
-
Quickly Repair the Fault
Carry out prompt repairs based on the root cause. For simple issues like loose connections or required cleaning, perform immediate fixes. For more complex problems requiring additional time and expertise, consider seeking technical support or assistance from maintenance personnel.
-
Testing and Commissioning
After repairing the fault, conduct testing and commissioning to verify the effectiveness of the fix. Restart the UV printer and perform simple operational tests. Ensure print quality is normal, the equipment runs smoothly, and no other abnormalities are present.
-
Preventive Measures and Maintenance
In addition to rapid fault resolution, preventive measures and regular maintenance are critical. Regular equipment inspection and maintenance—such as cleaning the printhead and replacing consumables—can reduce the frequency of failures and improve equipment reliability and stability.
Conclusion
Can different brands of ink be used interchangeably on inkjet printer?
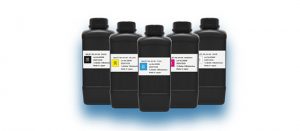
Inks from different brands are developed and manufactured to match the performance, ink systems and other specifications of their respective inkjet coders. Due to vast differences in chemical compositions, mixing inks of different brands will greatly raise the risk of clogged filters and printheads. This will disrupt normal production lines, and consequently increase factories’ operational and equipment maintenance costs.
Can expired ink for inkjet printers still be used?
As an inkjet coder manufacturer, we often receive customer inquiries regarding ink usage. Many clients ask whether unused ink will expire, if out-of-date ink is still usable, and whether different ink models can be used interchangeably on the same machine. We will answer these questions below.

-
Does ink expire?
The answer is yes, ink does expire. Shelf life varies for different types, models and brands of ink, including small character ink, solvents and UV ink. Generally, ink can be stored for 6 to 15 months, while the shelf life of solvents is usually over 18 months. You may check this information when placing orders.
-
Can expired ink or solvents still be used?
It is not recommended to use any ink or solvents past their shelf life.
Everything you need to know precautions for inkjet printer
I. Correct Startup Procedure
- Turn on the screen power supply (wait about 30 seconds after the screen starts normally).
- Turn on the printhead switch (after 30-40 seconds).
- Open the coder software, select or edit the print data, and start printing.
II. Daily Maintenance and Care
- Do not touch the printhead surface directly with hands or other objects. Only use the provided special dust-free soft cloth to wipe the printhead in one direction; do not rub back and forth.
- During printing, ensure the product does not scrape the printhead, as this may cause damage.
- When printing with UV ink, protect the printhead from light and dust. If printing is stopped for less than 12 hours: squeeze ink to wipe the printhead, perform a line test to check for clogged nozzles, and cover the printhead with its cap.
- Before daily startup: perform priming and a line test to check for clogged nozzles. Before shutdown at night: squeeze ink and perform a line test (do this twice daily), then wrap the printhead with a black plastic bag.
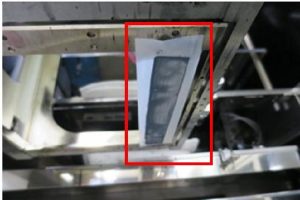
- After each use: squeeze ink again, wipe the printhead with a dust-free cloth, perform a line test to confirm no clogged nozzles, then shut down. (The line test effect is shown in the image on the right.)
- The optimal distance between the printhead and the product is 1mm to 3mm.
- If not used for 12 hours to 2 days: moisten a dust-free cloth with maintenance solution, place it on the printhead cap to keep the printhead moist. Perform daily priming and line tests.
- If not used for 5–7 days or longer: moisten a dust-free cloth with maintenance solution, place it on the printhead cap to keep the printhead moist.
- If not used for more than 15 days: thoroughly clean all ink inside the printhead, cover with the printhead cap, and then wrap the printhead with a black plastic bag.
Cleaning and Maintenance via Ink Priming & Line Test
- During printing, print quality declines, characters are unclear, or individual nozzles are clogged.
- The printer has not been used for an extended period.
- The printer is being started for the first time.
Specific Cleaning Steps:
- Stop printing and keep the ink path unobstructed.
- Press the ink priming switch to let ink flow out of the printhead until no air bubbles remain in the nozzles.
- Moisten a dust-free cloth with cleaning solution and wipe the nozzles. Restart the machine, print a test sample, and inspect the print quality.
- If print quality is still unsatisfactory, repeat the above cleaning steps.
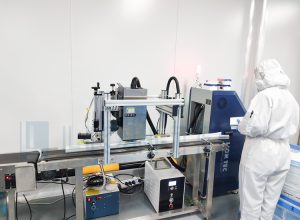
Which label design software is compatible with LIONTEC UV Inkjet Printer?
LIONTEC UV Inkjet Printer support three mainstream label creation software: Bartender, Cosesoft and NiceLabel. When combined with our intelligent UV inkjet system, these tools help you complete printing tasks efficiently at low cost, and also enable material processing during production.

UV inkjet printer are among the iconic equipment in the printing industry, with extensive applications and advantages in fields such as labels, hang tags, and cards. The continuous innovation and development of UV inkjet technology have brought numerous new technologies and applications to the industry, further driving the growth of the label printing market. We will also bring more intelligent and cost-effective inkjet printer to the label application industry, creating greater value for the sector!
What precautions should be taken when using an inkjet printer, and how to maintain it?
Both the inkjet printer and its ink must be stored and used in accordance with standardized procedures. To maintain the performance and efficiency of your coding equipment, and to prevent damage or other losses caused by human operational errors, LIONTEC, a professional inkjet printer manufacturer, introduces the key precautions for using inkjet printer. We hope this guidance will assist you in the operation of industrial inkjet printer.

1. Power Supply of the Inkjet Printer
- The inkjet printer operates based on high-voltage deflection, which generates and accumulates static electricity during use. If the static electricity builds up to a certain level, it may cause sparks or fires. Therefore, proper grounding is essential, and the ground wire must be inspected regularly. Poor grounding can lead to problems such as poor ink drop breakup and low print quality, so the inkjet coder must be grounded.
- If the fuse of the inkjet printer is burned out, please replace it only with a fuse of the same specification.
2. Ink for the Inkjet Printer
3. Inkjet Printer Consumables
- All used cleaning materials, such as cleaning tissues, pose a fire hazard. They must be collected and properly disposed of immediately after use.
- The consumables of the inkjet coder, especially solvent-based inks, are flammable. During use, keep them away from open flames to avoid unnecessary losses.
4. Operating Environment for the Inkjet Printer
-
No open flames near the inkjet printer
Many inks used in inkjet printer are solvent-based and flammable. Smoking or welding near the coder can cause fires or other safety hazards due to the solvents.
-
Ensure static interference is eliminated
The inkjet printer is a precision electronic device, especially the printhead, which requires ink droplet charging and high-voltage deflection. If static electricity is not properly grounded or interfered with by other large equipment, it may cause potential damage to the device. Minor issues include unstable operation and poor print quality; severe cases may result in burnt circuit boards or damaged display circuit boards.
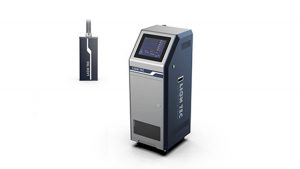
Consider these factors to maximize ROI with your UV inkjet printer
UV inkjet printer are intelligent coding systems, and their operation and print quality are often affected by multiple factors. Learn a little more about UV inkjet printer every day to better understand your equipment and maximize the return on investment from your coding solution!
1. Ink for the Inkjet printer
2.Ink Issues
3.Substrate Material
4.Ink Supply Negative Pressure
- A lower negative pressure value leads to excessive ink flow, causing ink buildup.
- A higher negative pressure value reduces ink flow, leading to broken ink streams.
Insufficient printhead negative pressure causes ink leakage, while excessive negative pressure hinders ink droplet ejection. Therefore, the negative pressure must be adjusted to the appropriate level for optimal print quality.
5.Curing Lamp and Other Issues
How to maintain the printheads of UV inkjet printer when the machine Is shut down for more than two weeks?
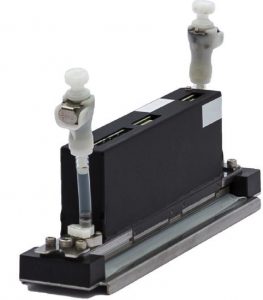
- First, clean the printhead of the UV inkjet printer with cleaning solution.
- Fully replace the ink inside the printhead with cleaning solution.
- Remove the printhead from the UV inkjet printer and store it on the original dedicated base delivered with the printhead.
- Attach a Teflon film moistened with cleaning solution to the nozzle surface.
Special Notes for Storage Methods: Always prevent the nozzle surface from drying out, regardless of the storage method adopted.
3 tips to fix distorted printing on inkjet printer

-
First, inspect the inkjet coder itself. Run a test print on several samples manually to confirm that the machine is operating normally.
-
If the inkjet coder is working properly, check the conveyor belt for speed synchronization issues. Printing distortion is most commonly caused by mismatched speeds between the conveyor and the printer.
Most inkjet printer print on products as they are carried past the nozzle by the conveyor. Unstable conveyor speed — whether too fast or too slow — will cause printed characters to deform: characters will be too close together if the speed is too slow, or spaced too far apart if it is too fast.
To resolve this, adjust the print width setting in the coder’s menu to match the raster print speed with the conveyor’s movement speed. You can also use data from the synchronizer to align the two speeds and eliminate printing distortion.
-
If the above two checks do not resolve the issue, investigate other external factors. Inspect the belt tension and check for motor vibration. Also consider other forms of external interference with the coder, such as mechanical faults caused by motor vibration or improper belt tension.